The day was warm-ish, our walk around the neighborhood was pleasant, and the painter was finished for the day. It was time to start playing with stamps, ink, and paper!
I began by looking through my “old” sets, then quickly chose Blossoms in Bloom. (OK, it was a quick choice because my sets are in alphabetical order.) Since purple, green, and yellow sing “Spring!” to me, these colors were also an easy choice for this anniversary card for my BIL and SIL this month:
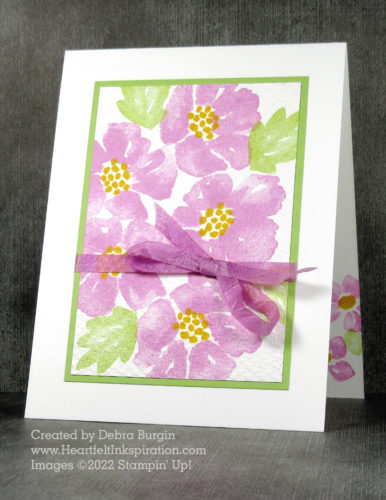
I love this stamp set because figuring where to put the flowers has already been decided for you — as you can see from the product image below, all those flowers are on one stamp!
I hope the texture on the floral panel is obvious here. That is such an easy way to get additional interest, even if you’re using a panel of Designer Series Paper.

I stamped all over the ribbon to color it Fresh Freesia, This piece of ribbon was actually intended for this card, but it ended up too dark using this technique. I have no explanation or defense for the upside-down bow.
Using the Stamparatus for the Freesia flowers, I made a handful of thank you note cards in no time! Those had no ribbon, but a little Ornate Frames sentiment label, using the “stamp in the hole” Stamparatus technique. This is much faster (and accurate) than stamping a scrap and die cutting it. Essentially, you are doing it in reverse order, stamping on a pre-cut label that is positioned in the negative die cut:
- Die cut the label from a scrap that is big enough to give 1/2″ margin or so all around; save the negative portion.
- Die cut as many additional labels as you will need.
- Using the Stamparatus, stamp the image directly on the grid paper.
- Center the negative die cut over the stamped image; secure with magnets.
- Place one die label in the “hole” of the negative die cut scrap.
- Stamp.
- Repeat.
If I can hire the 5th grader to help, I’ll make a short videotape on this.
Click the images below to add current products for this card to your cart in my Stampin’ Up! online store. Disclosure: I get a commission for purchases made through these links, at no additional charge to you. Thank you!
") |
 |
")


 Crinkled Seam Binding Ribbon")