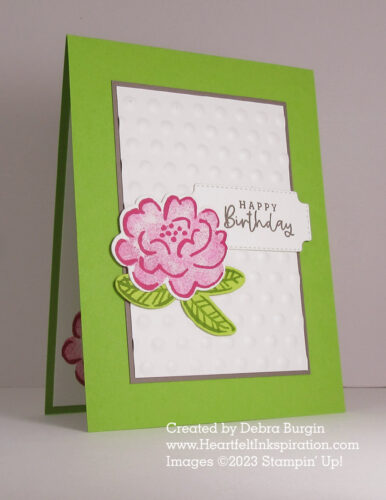
When I made this card, I pretty much immediately created something similar for camp this month. And here it is, sporting a hobnail-glass dots background, happy and darling!
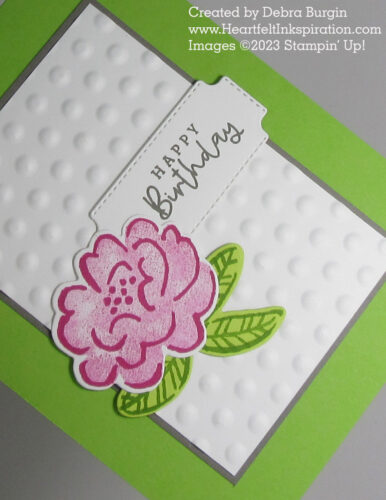
Have you ever wondered why using a foam mat under your work is useful when stamping with a photopolymer stamp, but not necessarily always? It’s clear (hah!) that those stamps do not have their own foam “padding,” unlike red rubber stamps. With a solid image, like the stamp for the “filler” of the flower, you want to be able to press firmly and evenly. Without a pad under the scrap, there’s a good chance the stamped image would have been missing areas (even taking into account that it is not a totally solid image to begin with).
However, generally speaking, using a line image doesn’t present a problem with obtaining a good stamped impression. Take the flower outline on this card: all those lines will hit the paper equally (assuming your stamping surface is solid). Ditto with the leaf outline and filler and the sentiment. So I rarely use a pad underneath my work when stamping line images.
For the flower on this card, we stamped the outline first in Berry Burst ink (I usually start with the darker image of a two-step image) on a Basic White scrap. Placing a foam pad under the Grid Paper, we inked up the filler image in Berry Burst and stamped off directly on the Grid Paper. With the Basic White scrap placed on the Grid Paper (and the foam pad still underneath), we stamped the filler over the stamped outline image.
I hope this makes sense; feel free to ask me to clarify anything I’ve said. But here are a couple more points:
- But does it cause a problem if you use a pad for line images? No, so if it’s easier, consistently use a pad.
- What do I use for a pad? For years I have used a foam-backed vinyl placemat. As you can imagine, the foam is not very thick, just enough to allow you to get some pressure when you stamp. The design on the placemat is quite horrid, but I think I paid $1 for it — and cut it into four pieces! If you can find one (perhaps at a dollar store), it’s worth the dollar! Or $1.25.
I played this June camp card “sweet,” but changing the colors and the embossed panel will turn this into something (almost) totally different!
Click the images below to add current products for this card to your cart in my Stampin’ Up! online store. Disclosure: I get a commission for purchases made through these links, at no additional charge to you. Thank you!
")