Thank you in scraps

The other day my husband asked me for some thank-you cards. Of course, I have some in the card box, but they were not quite right for the guys who worked so hard to clean up the cemetery after a tornado passed close by a few weeks ago. Yes, indeed, thank you for all the work and for the big equipment you brought over!

This picture was taken just last weekend. In the foreground, you can see where the massive limbs gouged the ground. Amazingly, no gravestones were damaged! But it was shocking and sad to see the sorry state of so many trees, even from afar as we drove up.

Oak Mound Cemetery, Somonauk, IL

Both Burgin families worked, too, carrying load after load of big limbs and small branches to the burn piles. It was hard work (lots of steps!), but very satisfying to get a big start on the job.
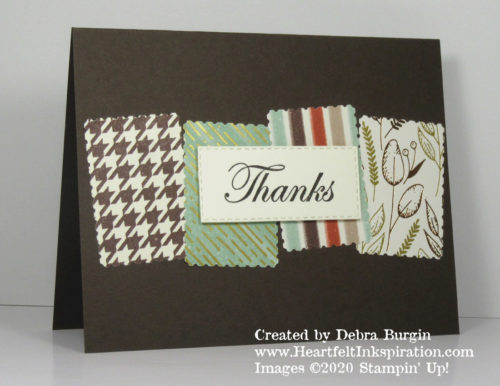
Gilded Autumn | Good Morning Magnolia | Please click to read more! | Stampin' Up! | HeartfeltInkspiration.com | Debra Burgin

More of these cards will go to families who are helping pay for the professional tree work. I love “our” beautiful and historical cemetery, and it’s wonderful that so many people support it with money and time. (Unlike many cemeteries, Oak Mound is not supported by county taxes.)

You can find this layout all over — some stampers use strips of DSP, but punching scraps goes very quickly, too. Wouldn’t this be a great layout for a birthday card?
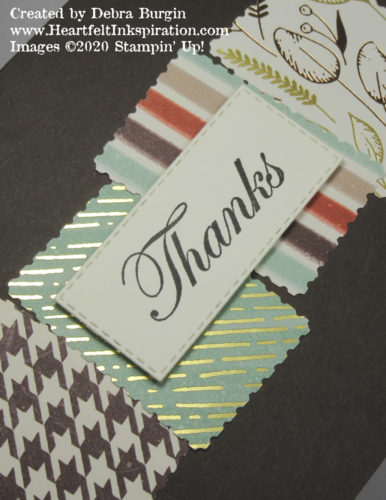
Gilded Autumn | Good Morning Magnolia | Please click to read more! | Stampin' Up! | HeartfeltInkspiration.com | Debra Burgin

I told you in Wednesday’s video that I have no current 12″ x 12″ Christmas patterned paper in my craft area. What I do have, though, is scraps from the recent Holiday Stamp-a-Stack to Go events in October and November. I’ve got kind of big project in mind to use up those scraps; I hope Mr. Junior Assistant will help!

Click the images below to add products for this card to your cart in my Stampin’ Up! online store. Disclosure: I get a commission for purchases made through these links, at no additional charge to you. Thank you!

Posted in 2020 Aug-Dec Mini, Masculine, Thank You | Tagged | 2 Comments

NOEL pleated rosette garland

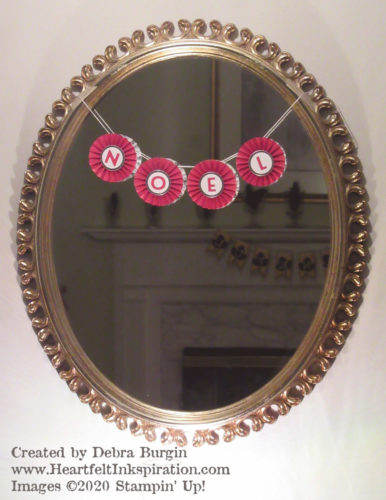
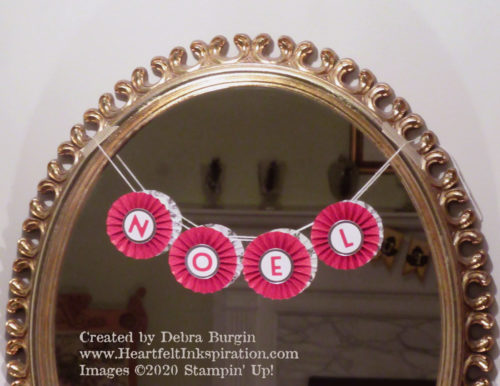
Here’s the finished project I showed you in yesterday’s video. This is the mirror in our front hall. It’s plastic! It fit perfectly in the dining room of our last house and immediately found a home here, against this silver-gray wall.

Playful Alphabet | This easy pleated rosette will eventually be hung on our family room mantel.  Please click to read more! | Stampin' Up! | HeartfeltInkspiration.com | Debra Burgin

This is not the final resting place of this garland. I plan to put it in the family room, but our house is mostly still in autumn/Thanksgiving mode. In fact, reflected in the mirror, you can see the THANKFUL garland still hanging on the living room mantel!

Playful Alphabet | This easy pleated rosette will eventually be hung on our family room mantel.  Please click to read more! | Stampin' Up! | HeartfeltInkspiration.com | Debra Burgin

I attached the white baker’s twine (retired) to the back of each rosette with Glue Dots, then glued a small circle of card stock over that to make sure the twine would stay put.

Have you tried the Tasteful Labels dies yet? They are much more than shapes. Next week I’ll show you another project made with these same scalloped circles and the Playful Alphabet dies — another great set!

Click the images below to add products for this card to your cart in my Stampin’ Up! online store. Disclosure: I get a commission for purchases made through these links, at no additional charge to you. Thank you!

Whisper White Solid Baker's Twine
Whisper White Solid Baker’s Twine
[124262]
$3.50
Posted in 2020 Aug-Dec Mini, Anything But a Card (ABC), Christmas | Tagged | 1 Comment

Making a pleated rosette

A pleated rosette, also known as a pleated medallion or lolly, is fun to make and pretty easy, too — it doesn’t really take two people! Use a rosette one to decorate a package or gift bag, or create some home decor! Visit the heartfeltinkspiration.com blog later this week to see the finished project using the rosettes I make here.

And one quick tip: If you’re making a bunch of these, score a large piece of 12″ x 12″ Designer Series Paper then slice across into strips. So much easier than scoring the strips individually.

Posted in Anything But a Card (ABC), Tutorial, Video | Tagged | 6 Comments

Wrapped In Christmas: The Joy of the Season

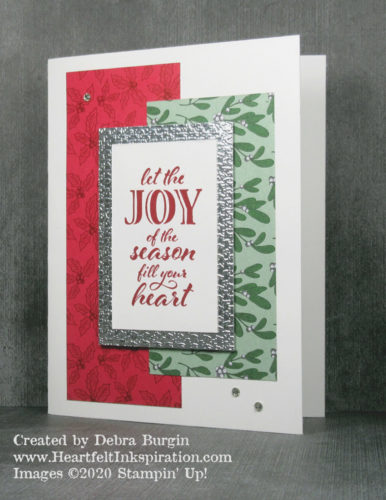
Perhaps you were as shocked as I was when Stampin’ Up! retired its standard Glimmer Paper. Especially after it was reintroduced with no flaking and easier cutting, I thought it would live forever. Alas, no. So I needed to come up with a substitute for glam and sparkle.

Wrapped in Christmas | Embossing Silver Foil paper adds a lot of glam to this card, and is a great substitute for glimmer paper.  Please click to read more! | Stampin' Up! | HeartfeltInkspiration.com | Debra Burgin

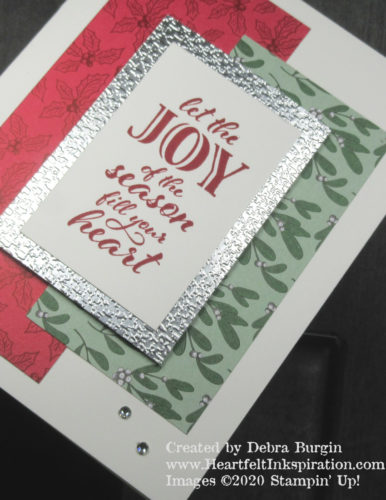
This card, the last of the October Holiday Stamp-a-Stack to Go cards, uses a piece of Silver Foil paper embossed with the Tasteful Textile embossing folder for just that purpose. I admit I panicked a few weeks ago when I could not find the folder in my stamping area(s) and nearly ordered another during the Online Extravaganza. It gets a lot of love here! Some Rhinestone Basic Jewels add more sparkle. And why not?

Wrapped in Christmas | Embossing Silver Foil paper adds a lot of glam to this card, and is a great substitute for glimmer paper.  Please click to read more! | Stampin' Up! | HeartfeltInkspiration.com | Debra Burgin

If you need a bunch of quick cards to efficiently use your Designer Series Paper (one piece cut 2″ x 5″, the other 2″ x 4″) and a limited number of supplies, this is it!

Click the images below to add products for this card to your cart in my Stampin’ Up! online store. Disclosure: I get a commission for purchases made through these links, at no additional charge to you. Thank you!

Posted in 2020 Aug-Dec Mini, Christmas, Holiday Stamp-a-Stack to Go | Tagged , | Comments Off on Wrapped In Christmas: The Joy of the Season

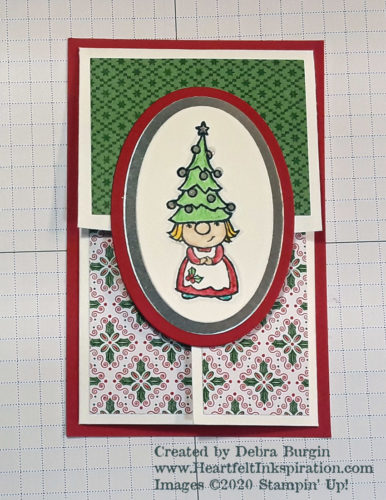
Gnome for the Holidays: Gift card holder

As promised, here are the measurements and tips for the gift card holder in last Wednesday’s video. There weren’t any errors in the video, but I think it sounded like I may have been hitting the eggnog a bit early in the season. If you like to read rather than view a tutorial, I hope you’ll find this helpful!

This gift card holder measures 3″ x 4⅝” when closed. It fits perfectly in a Note Card Envelope or a larger, standard Medium Envelope. When the top flap is opened, you have a pocket to insert your gift card or cash.

Gnome for the Holidays | This gift card holder starts with a medium envelope!  What happens after that is up to you!  Please click to read more! | Stampin' Up! | HeartfeltInkspiration.com | Debra Burgin

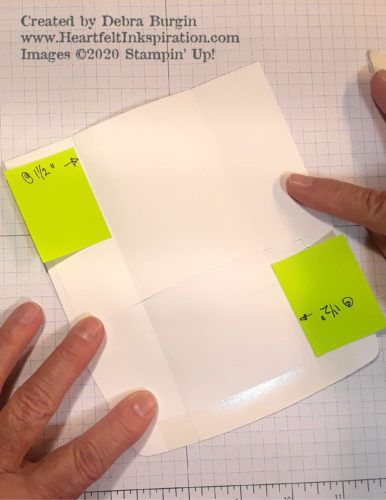
First, open up the flap of a Medium Envelope. Score each side at 1½”, as shown below. I find it easier to score with the side of the envelope against the side of the Simply Scored Scoring Tool. Then I rotate the envelope 180 degrees and repeat the score on the other side (that’s why my sticky note is upside down). Doing it this way ensures I have the scores the same distance on each side.

Gnome for the Holidays | This gift card holder starts with a medium envelope!  What happens after that is up to you!  Please click to read more! | Stampin' Up! | HeartfeltInkspiration.com | Debra Burgin

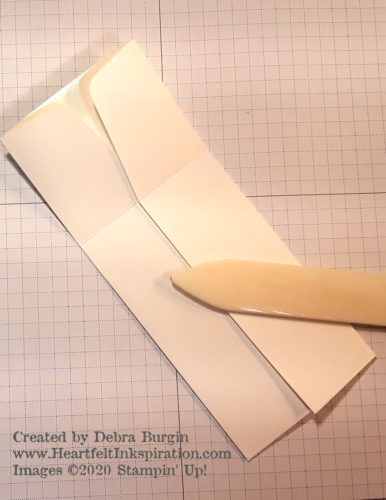
Fold the sides in and burnish the creases with a Bone Folder.

Gnome for the Holidays | This gift card holder starts with a medium envelope!  What happens after that is up to you!  Please click to read more! | Stampin' Up! | HeartfeltInkspiration.com | Debra Burgin

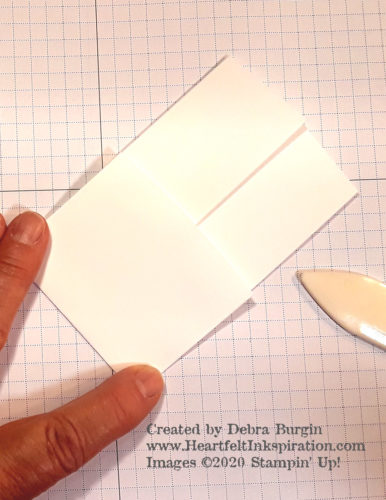
Fold the flap over and burnish the crease. Then flip the whole thing over and burnish the creases from the back (not shown).

Gnome for the Holidays | This gift card holder starts with a medium envelope!  What happens after that is up to you!  Please click to read more! | Stampin' Up! | HeartfeltInkspiration.com | Debra Burgin

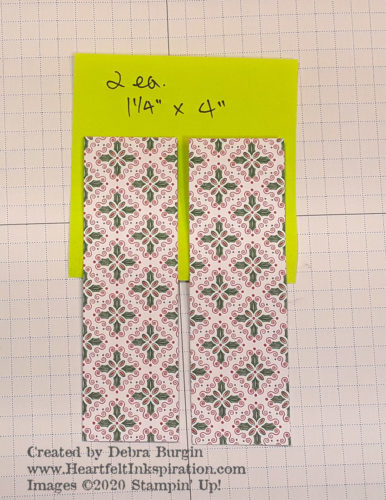
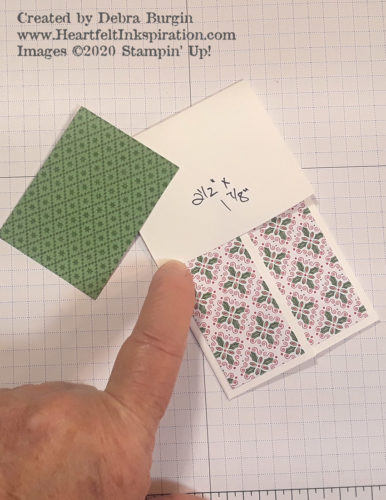
Now for the fun part! Cut two pieces of patterned paper 1¼” x 4″. If there’s a pattern going across the paper, you’ll want to keep it straight. Flat adhere a strip to each side flap of the envelope, keeping a 1/8″ margin on the sides and bottom. (The top margin is slightly larger, but you don’t see it with the holder closed.) Note that there is a slight overlap of the flaps when they are closed, which visually keeps the 1/8″ margin on each side of the strips.

Gnome for the Holidays | This gift card holder starts with a medium envelope!  What happens after that is up to you!  Please click to read more! | Stampin' Up! | HeartfeltInkspiration.com | Debra Burgin

Depending on the focal point for the gift card holder, you may wish to flat adhere to the envelope flap a piece of patterned paper 2½” x 1⅞”, maintaining the 1/8″ margin on the sides and top edges. There is a slight curve at the bottom of the flap that will be covered by the focal point.

Gnome for the Holidays | This gift card holder starts with a medium envelope!  What happens after that is up to you!  Please click to read more! | Stampin' Up! | HeartfeltInkspiration.com | Debra Burgin

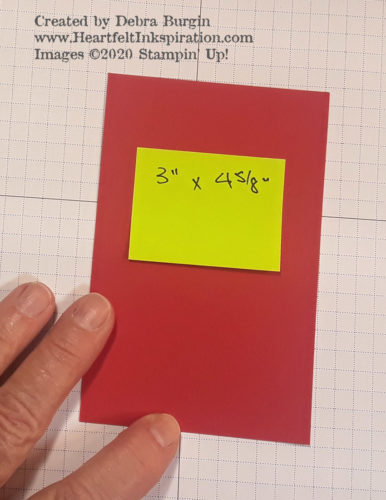
Next, cut the back, which measures 3″ x 4⅝”. Flat adhere the back of the gift card holder to this piece, maintaining the 1/8″ margin on all sides.

Gnome for the Holidays | This gift card holder starts with a medium envelope!  What happens after that is up to you!  Please click to read more! | Stampin' Up! | HeartfeltInkspiration.com | Debra Burgin

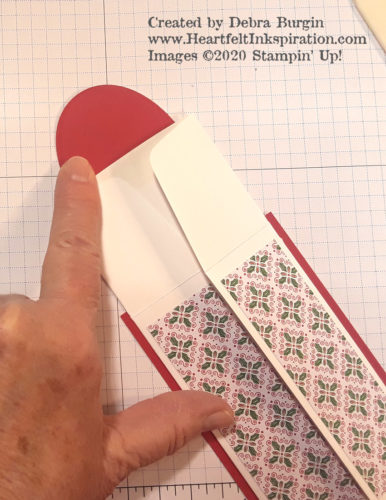
Finally, create your focal point and flat adhere it to the envelope flap, taking care not to adhere the bottom part! You do not want to glue the holder closed, right?

Gnome for the Holidays | This gift card holder starts with a medium envelope!  What happens after that is up to you!  Please click to read more! | Stampin' Up! | HeartfeltInkspiration.com | Debra Burgin

I hope this is helpful! If you have questions, please post in the comments and I’ll reply as soon as I can. Enjoy this little project!

Posted in 2020 Aug-Dec Mini, Anything But a Card (ABC), Christmas, Tutorial | Tagged , | 2 Comments

Paper Pumpkin: Beary Comforting

Paper Pumpkin Beary Comforting

As this beary tough year reaches an end, all of us could use a big bear hug. Create unbearably cute and cuddly cards with the Beary Comforting Paper Pumpkin Kit! December’s extra encouraging kit includes enough supplies to make and send 12 comforting cards to your family and friends. With vibrant patterns, thoughtful sentiments, and warm and fuzzy woodland friends, this kit has just the trick to uplift the ones you love! And, of course, it’s good to have comforting cards on hand, right?

  • Kit contains enough supplies to create 12 cards and coordinating envelopes.
  • Card size: 4-1/4″ x 5-1/2″
  • Envelope size: 4-1/2″ x 5-3/4″
  • Coordinating colors: Basic Gray, Calypso Coral, Cinnamon Cider, Daffodil Delight, Rich Razzleberry, Soft Sea Foam, Whisper White

As a Paper Pumpkin subscriber, you’re provided with everything you need to explore your creativity and discover new ways to craft. You can skip right to the fun! The deadline to sign up for the December Paper Pumpkin Kit is Thursday, December 10. Sign up here.

Posted in Encouragement, Kit, Paper Pumpkin | Tagged , | Comments Off on Paper Pumpkin: Beary Comforting

Gift card holder

On Monday, November 30, I’ll have more information (and some corrections!) on this clever gift card holder made from an envelope.

Posted in Anything But a Card (ABC), Christmas, Video | 4 Comments

Merry & Bright Online Extravaganza extended!

BREAKING NEWS: Because of technical difficulties during the ordering process, Stampin’ Up! is extending the Merry & Bright Online Extravaganza through Wednesday, November 25!

The promotion is the same: receive 10% off select Stampin’ Up! Annual Catalog items. Hundreds of items are included in this sale, but you can see the exclusions here. This is the time to get those things on your shopping list, even if you have to wrap them yourself for a later celebration!

My offer to you is the same also: place an online order with me of at least $50 in product (before discount, S/H and tax) and receive a spool of Real Red 3/8″ Sheer Ribbon (page 15 of the current Mini catalog) FREE. You must use Host Code HT444R3N to earn your free ribbon. Of course, you’ll earn a Burgin Buck with your order as well! You may also place an order with me if you prefer, through whatever means is best for you, as long as it’s before 9 p.m. CT on November 25th, please!

Posted in Stampin' Up! Promotion | Tagged , | Comments Off on Merry & Bright Online Extravaganza extended!

Merry & Bright Online Extravaganza

Today only, receive 10% off select Stampin’ Up! Annual Catalog items — really, almost everything is on sale, but you can see the exclusions here. This is the day to get those things on your shopping list!

My list? Some replacement Stampin’ Blends, some cardstock, some embellishments, more Linen Thread and Magenta Madness 2020-2021 In Color 1/4″ Ribbon — this is the start of it.

Don’t miss out! This promotion only lasts today, November 24. Place an online order with me of at least $50 in product (before discount, S/H and tax) and receive a spool of Real Red 3/8″ Sheer Ribbon (page 15 of the current Mini catalog) FREE. You must use Host Code HT444R3N to earn your free ribbon. Of course, you’ll earn a Burgin Buck with your order as well! You may also place an order with me if you prefer, through whatever means is best for you, as long as it’s before 9 p.m. CT, please!

Posted in Stampin' Up! Promotion | Tagged , | Comments Off on Merry & Bright Online Extravaganza

Wrapped In Christmas: Noel

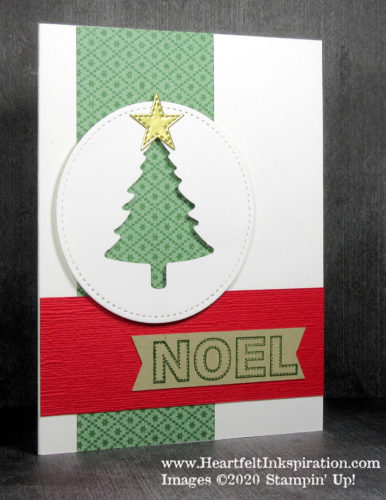
Here is another card designed by Jennifer Taylor for our October Holiday Stamp-a-Stack to Go. I love this sentiment. “Noel” is a simple, beautiful word, and I like that it is stitched here.

Wrapped In Christmas | Pine Tree | The peek-a-boo window on this card is perfect to create this patterned Christmas tree!  Please click to read more! | Stampin' Up! | HeartfeltInkspiration.com | Debra Burgin

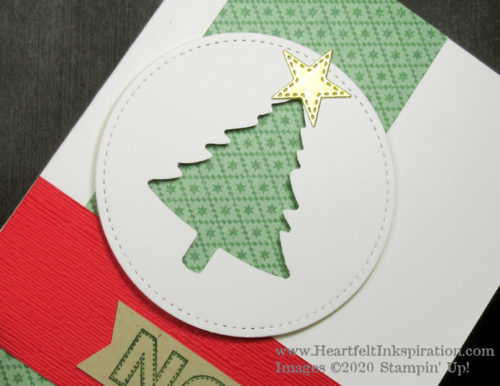
Creating a peek-a-boo window to show off patterned paper within a punched element is a neat trick, and using the Subtle embossing folder on the Real Red panel provides texture.

Wrapped In Christmas | Pine Tree | The peek-a-boo window on this card is perfect to create this patterned Christmas tree!  Please click to read more! | Stampin' Up! | HeartfeltInkspiration.com | Debra Burgin

Notice the repetitive design element: stitching on the sentiment, circle, and star! I have not gotten tired of the stitching trend, and I’m happy to see some variations in the upcoming Stampin’ Up! 2021 January-June Mini Catalog. (I am waiting, but not very patiently, for it to show up at my house!)

Click the images below to add products for this card to your cart in my Stampin’ Up! online store. Disclosure: I get a commission for purchases made through these links, at no additional charge to you. Thank you!

Posted in 2020 Aug-Dec Mini, Christmas, Holiday Stamp-a-Stack to Go | Tagged , | Comments Off on Wrapped In Christmas: Noel