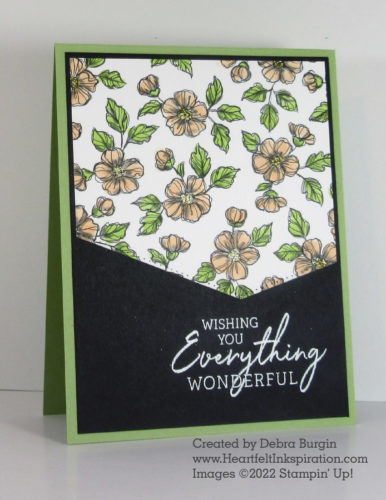
This “angled cut” layout is so simple! Start with hand-colored Designer Series Paper, as I did here, or any 4″ x 3½” piece of your favorite DSP (I trimmed it down to 3⅞” x 3½” to allow for the black panel). Although you could add twine, ribbon, or other embellishments, those are totally optional!
I’ve mentioned before that I use a template to mark the DSP so my cuts are consistent. If you want to use the same angle as I have here, create a template with a retired piece of card stock — a bright color so you don’t misplace it on your work table! Mark 2½” on the left edge and about 3″ (or even a bit less) on the right edge. The point of the die will be 1½” from the right edge. Once you get your template the way you want, you’ll mark your DSP at the left and right sides and the point, and position the die so it hits those three marks.
Naturally, you can choose different measurements for your “angled cut,” but it’s easiest and fastest for me if I use the same template each time.
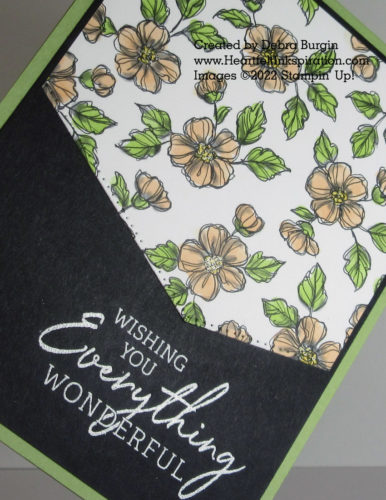
Full disclosure: I stamped and embossed the sentiment after I had the other pieces adhered to the card front! This was a risky move. I originally thought I’d use a separate piece for the sentiment, but I wanted to keep the drama of the Basic Black and so it made more sense to emboss it in white. These stamps are photopolymer, so it was a simple matter to get this straight.

Click the images below to add current products for this card to your cart in my Stampin’ Up! online store. Disclosure: I get a commission for purchases made through these links, at no additional charge to you. Thank you!


