I thought I was done showing you past camp cards, but as I was tidying up my computer file folders, I discovered this one from May (CASEd from Ann Murray):
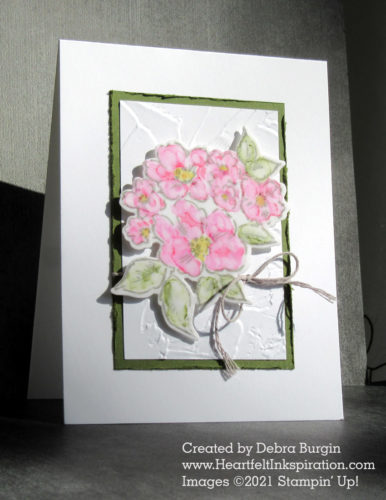
I hope you can see how beautiful the coloring is on this image — my first attempt at this technique! We haven’t done any watercoloring together for ages, and I miss the dreamy, unpredictable results. Beginning with color applied with Stampin’ Blends is a fascinating experiment. If you don’t like it, well, it’s only paper!
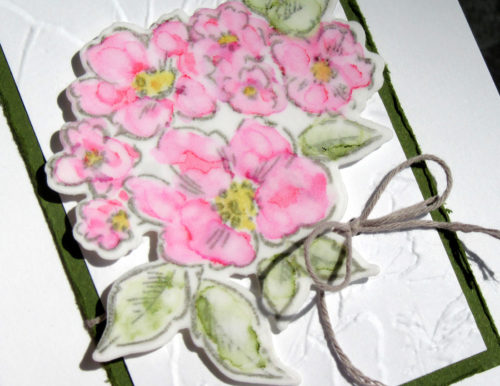
I remember why I delayed this post: I thought I would do a video tutorial on how to color with Stampin’ Blends and rubbing alcohol. That just won’t happen, but here are the steps:
- On a scrap of Vellum, stamp the image using regular Classic Ink (I used Basic Gray). Allow to dry thoroughly.
- Using small tip of Stampin’ Blends marker, scribble color on flower petals (not centers) and leaves, not filling in entire area.
- Use a small paintbrush to dab (not paint) a bit of rubbing alcohol on color. It will spread. Clean brush between colors. Note: I used rubbing alcohol in an old water pen.
- Allow to coloring to dry, then add additional color if desired.
- Add flower centers with marker only.
- When stamped image is dry, apply adhesive sheet to Basic White scrap and adhere to Vellum; die cut both at once.
Adhering the white cardstock behind the Vellum makes the colors pop and gives stability to the Vellum. And of course, you then can use Stampin’ Dimensionals without them showing through.
Click the images below to add products for this card to your cart in my Stampin’ Up! online store. Disclosure: I get a commission for purchases made through these links, at no additional charge to you. Thank you!


